Fleur de Lis

Starting a quilt in February of 2019. The pattern is called Fleur de Lis and is an in the hoop quilt designed by Hoopsisters. The pattern is only available thru local quilt shops who are dealer partners. The pattern is delivered and available thru the local shops for 2 years before it is released as an open pattern.

This process is fabulous! It does frustrate some individuals who do not have a local quilt shop (LQS) participating. However, the past patterns have been released and this helps the locals, Hoopsisters and the quilters. By using this strategy new quilters are gained and the art is growing.

My local quilt shop is The Sewing Basket in Plymouth, WI. A “big shop in a small town!”

I have joined the group creating and working on Feur de Lis. We will work on it from February thru June.

My journey began on February 1, 2019 with a 2 hour demo and discussion session with the mentor (Elayne) and other participants. This was the intro and how to set up and organize. How to read the pattern. The steps that need to be in place to start. The challenge of making those decisions and choosing the fabrics.

Another 2 hours and I had my fabrics and a plan for moving forward.

The quilt top fabrics:

Quilt Top Fabrics

The backing fabrics:

Backing fabrics

My choices were a 6 inch block quilt with added borders and a pieced backside.

It will finish to approximately 73×73 inches.

We receive files for the in the hoop along with directions each month. This first month will be the creation of 12 blocks. As I am doing the pieced back and the optional borders, I have a few more tasks to complete.

First is getting the fabric ready. The fabric is pre-washed and ironed to make it ready to use. This was about a 5 hour task between washer and iron.

Creating the organization strategies and documentation begin – they will evolve with the project.

Materials Dcoumentation

Next was cutting the material for the first 12 blocks. Also cutting of the backing to create half square triangles – and then making them. Last was cutting the remainder of the backing pieces for the optional border. Time on these tasks were about 7 hours.

Backing and Borders cut

Half Square Triangles Back

Half Square Triangles - Back

Next is cutting the battilizer and begin stitching the first 12 blocks and then the some border blocks.

Month 1 Blocks

Our next gathering and demo (with an optional stay and sew) is March 1. I should have the blocks and border sections done by then. each block is approximately an hour to 90 minutes from start to finish.

Looking forward to this journey! Not sure I can wait 5 months -but that is the plan.


Projects List!

#4Life Path Intersects O’Keeffe-DS106-Creating-Community

Tony Vaccaro

Reading my feeds and mail today some interesting intersections of things to think of and connect.
First there was the new blog post by Nana Lou in the Burgeron Family site about a Conference Presentation on Twitter that several of the members collaborated on and delivered. In true DS106 and Burgeron style it was extraordinary, world class content creatively and succinctly put together to tell the story. AWESOME WORK FAMILY!.
I have been balancing digital art, hands on art, family, and some consulting work over the last 6-8 months. I saw the rally call and was very humbled that my place in the family group was thought to be a contribution and possible inclusion. This group of individuals has been a milestone marker on my life path and I do consider them family. The wonderful thing is – it really is a type of family – no one gets ex-communicated because they don’t participate in everything. Sometimes you put in more work than others and sometimes you slide – but you are always valued and included (aka respected and loved).

This event was started by Todd Conway – Ronald L., stepped up and Rochelle Lockridge was right in there pulling things together again. Others as well – all connected. The summary of the Twitter conference was captured by Nana Lou Burgeron on how Todd got everyone started and the 15 minutes of fame can be read here.
Once again an excellent example of how art and technology along with community can be the most wonderful educational environment for all learners. (remember – my view is we are learners from birth to grave and it is personal)
I am very proud of my digital family and the work they do. I am also thankful that I will have the opportunity to continue to create and connect with them even though I kinda let this one fly by me. How great is that?!
Next in my feeds were conversations from a beginning quilters group.

 This group finds excitement and energy in sharing new tips, new found knowledge, sharing of projects and supporting each other. Much like DS106 community – it is art, it is individual, but it is also collaborative. Sharing is important and done freely and often and it is expected that you build from someone else’s work and efforts and return to allow others to take and make in their own way. So the making is hands on – but the ideas, the knowledge building and sharing are digital.
My next feed was a post from Connie Weber. A fantastic educator in MI who always keeps everyone thinking and looking at the world with fresh eyes. She is an artist in the sense of her creations and her work with her 5th grade students. Everyone should be in her learning community!
Today she posted an article about Georgia O’Keeffe’s ideas on what it takes to be an artist. O’Keeffe has always been a favorite of mine. Her art, her views on life. While she very much seemed to be a loner and prefer to secluded from others, she was very much someone who shared and created community. She did so through her writing. No social media in her time, but letters. She shared with others, listened and took in responses. So while physically she kept to herself and created – she always was connected to others and had the conversations of art and life that made her work better and stronger. That community also supported her. It allowed her to be the artist she was instead of the artist society might have dictated.
Her lessons all make sense to me. They apply to many aspects of my life.
And with DS106 in my #4Life – I would add to Georgia’s work on lessons and add #5.

Lesson #1: Observe the world around you—closely, hungrily

This one has rung true in everything from parenting, photography, daily living and business. You can learn so much from just looking closely. (Flickr 365  Pic a day)

Lesson #2: Organization is key to productivity

Another one that I have learned the hard way over the years. The tedious, the details, the right tools, the organizing to create are important. When you have this in place it frees you to focus on the creating -thus you are productive. It is hard at first – but pay off is great. Once established it generates more creation time vs. wasted time finding, sorting, cleaning up….

Lesson #3: Don’t sweat mistakes—learn from them

Always! Fail Forward!!! Mistakes are you friends and best teacher. You only have to sweat them when you allow them to be the result. What you do with your mistakes is most important.

Lesson # 4: Pay no attention to trends—be yourself

The best is you. It is not a competition with others – only yourself. The lure of fame or the fast buck or being popular can sometimes cloud. But when you really look at those who do achieve greatness – they didn’t worry about being most popular – they only focused on being a better “me”. The greatest individuals and contributors are usually the ones nobody does know. The few that do become “great” often are the representative of the many who contributed. There are the few that take the extra effort and stand out and represent the many who work behind them – rather alongside them knowing it is the work and creating that is important.

My addition:
Lesson #5: Connect, collaborate, build from others to create community and trust.

Art and creating is individual and personal – but it happens when you are doing your own thing alongside others. It becomes greater thru sharing and building. When you find community that respects and appreciates your individual work but can make it their own in a slightly different way – wow!

My wish is you all experience that at some time. It makes a better you if you let it happen. And all it is is sharing and supporting, accepting and respecting. Go for it!

Creating in fabric – still Art

I continue to be creating in fabric lately. The digital part is documenting what I am doing.

I have a collector gene and sewing seems to fill that as well. There is the fabric hunt and acquisition. The tools and accessories. The patterns and the products. And then the set up and the organization. It really does fill so many spaces.

Organizing and creating rhythms and processes is necessary. I now have a command hook on the side of my sewing machine with my tail cutting scissors. Practicing using and putting back and always knowing where it is.

I used a letter sorter for hold my rulers. A vintage creamer and sugar bowl for my fabric clips. Bed risers on my table to raise it so it is comfortable for cutting and sitting at on a counter stool for assembly.

Next was the presser feet that came with my machine. the little plastic pouch was useless. I got an inexpensive plastic bead box and added labels. So far works great!

Presser foot storage

Bobbins – I started with a small plastic case. Each time I opened and took on out – they all came out and landed all over the room. And the tails – ugh!. I used some Amazon points and got some huggers for my spools and a BobbinSaver – a plastic ring that holds the bobbins. So far it is a huge improvement.

Bobbin storage

Thread tail containment


I have found a mentor to help me thru things. A smart and talented woman who does fantastic work – but with reality mixed in. She knows how to get to quality – but get the job done. Can’t thank her enough for taking me under her wing. We have some similar interests and she is so generous in her sharing and help online. LOL – she has chickens and roosters and one of her favorite fabric subjects are rooters…under her wing – — get it? LOL She is also a Flash WonderWoman! She can make 2 dozen feed sack totes in a day! Check her out at Grammies Little Aprons and Sew Much More on Facebook.

I am not looking to expand into selling lots of things and having to keep an inventory. But I am going to need an outlet to move some of the creations on. I already know I have more than I can use. I am exploring options.

The path I am most interested in is combining my vintage shopping pleasures with creating. The other tangent is learning more skills and getting to take part in activities from a small business in my hometown and support them – so using quilting techniques in my up cycle vintage creations. That probably really limits the market share. But I am not look

ing to earn living or make a fortune.

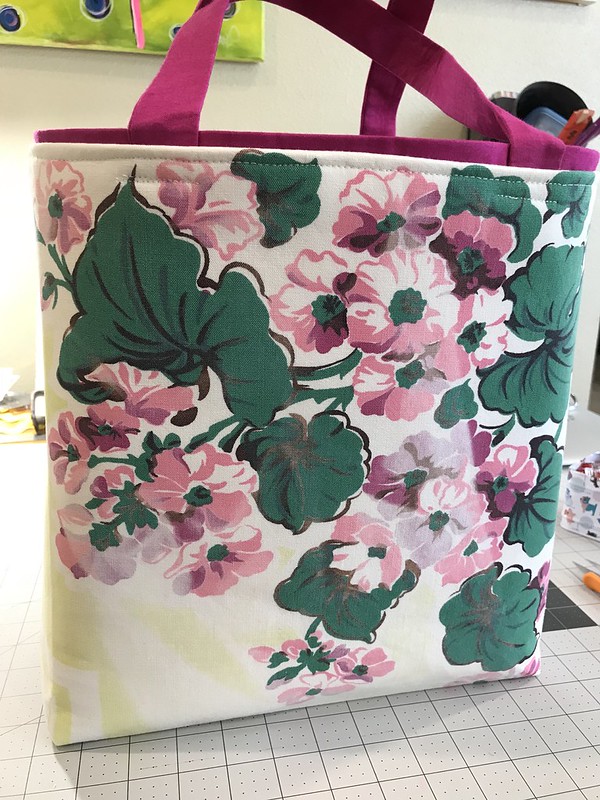
I met a vintage crafter online who was moving her MIL’s estate and purchased (very reasonably!) some Christmas tablecloths and a floral. The floral is dynamic. Not a favorite of mine, but it makes a statement. I worked on some interfacing combinations and some other things and created a nice size tote. Not as large as I had done – so actually more useful.

Standard tote

I was pleased with the results. I didn’t have dark pink thread on hand and didn’t edge the handles. My mentor was quick to point that out. I went ahead anyways.

There was still fabric left. I wanted to do a different style bag. Since I am not in a mass production cycle – I am more apt to create different bags for many reasons. One to keep improving my skills and two I don’t know what to do with them now – why would I have dozens of the same thing in different patterns. If I was doing craft shows or mass market, one type might work. For now I am creating one of a kind and limited designs.

So from this fabric I got a “Happy Bag”. A bag with a large “smile” pocket on the front.

Happy Bag - Front "smile Pocket"

Back of the bag.

Back of Happy Bag

I had to go to the vet today for meds for our Jaxin. It was a Saturday and there is this place near by called Northwinds Junk Post that I have wanted to explore. They are only open on weekends and it is 35 miles away – today was the day!

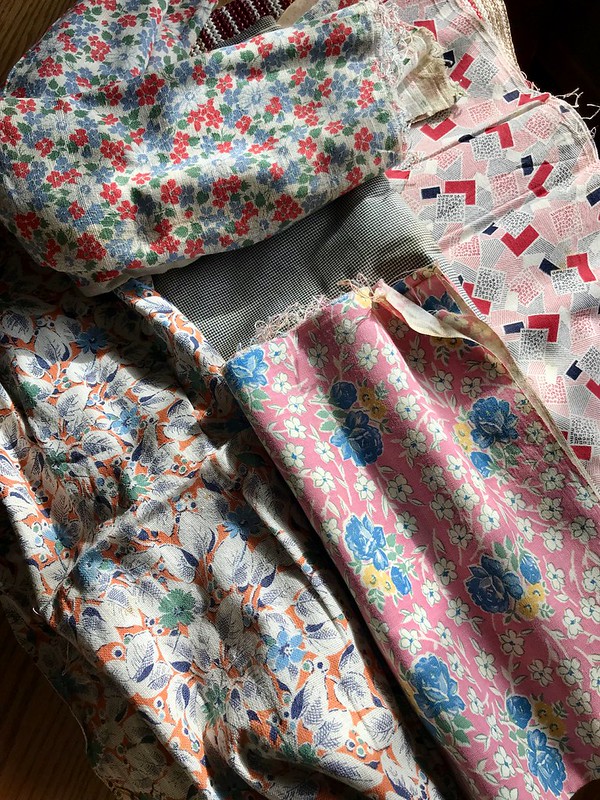
I was fortunate to find some seed sack cloth yardage. A little dirty – but cleaned up well. I can’t wait to use it as lining or as a bag itself. I will now be able to create an entire end product with vintage cloth!

Vintage Fabric SKOR!

All cleaned and folded for storage until used.

Vintage Fabric - cleaned and folded

And now I need to find LARGE vintage buttons and other doo dads!!! Lynn Prey – help!!! What do I look for and what are good prices?

For being in Wisconsin in the winter – things are feeling good and creating is going on.


Vintage camels tote

Vintage panel bag project

Finished the vintage camel cloth into a tote bag.

Vintage panel bag project

Added a pocket panel on the inside.

Vintage panel bag project

Feeling pretty good about this one. :-). No pattern – just math, some techniques and construction things I finally was able to do smoothly. Improvement on my edge stitching. Using up fabric and repurposing fabric that may have went to the landfill.

Now what do I do with it????


css.php