Fleur de Lis

Starting a quilt in February of 2019. The pattern is called Fleur de Lis and is an in the hoop quilt designed by Hoopsisters. The pattern is only available thru local quilt shops who are dealer partners. The pattern is delivered and available thru the local shops for 2 years before it is released as an open pattern.

This process is fabulous! It does frustrate some individuals who do not have a local quilt shop (LQS) participating. However, the past patterns have been released and this helps the locals, Hoopsisters and the quilters. By using this strategy new quilters are gained and the art is growing.

My local quilt shop is The Sewing BasketΒ in Plymouth, WI. A “big shop in a small town!”

I have joined the group creating and working on Feur de Lis. We will work on it from February thru June.

My journey began on February 1, 2019 with a 2 hour demo and discussion session with the mentor (Elayne) and other participants. This was the intro and how to set up and organize. How to read the pattern. The steps that need to be in place to start. The challenge of making those decisions and choosing the fabrics.

Another 2 hours and I had my fabrics and a plan for moving forward.

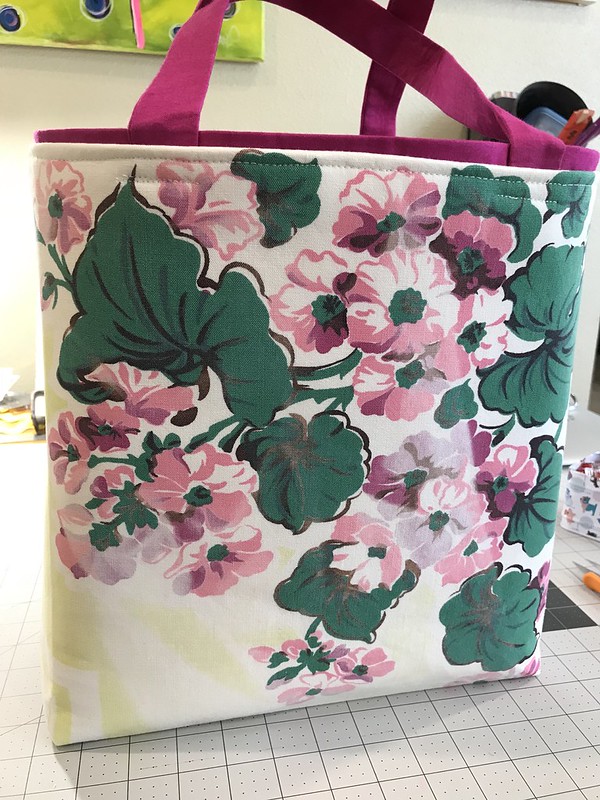
The quilt top fabrics:

Quilt Top Fabrics

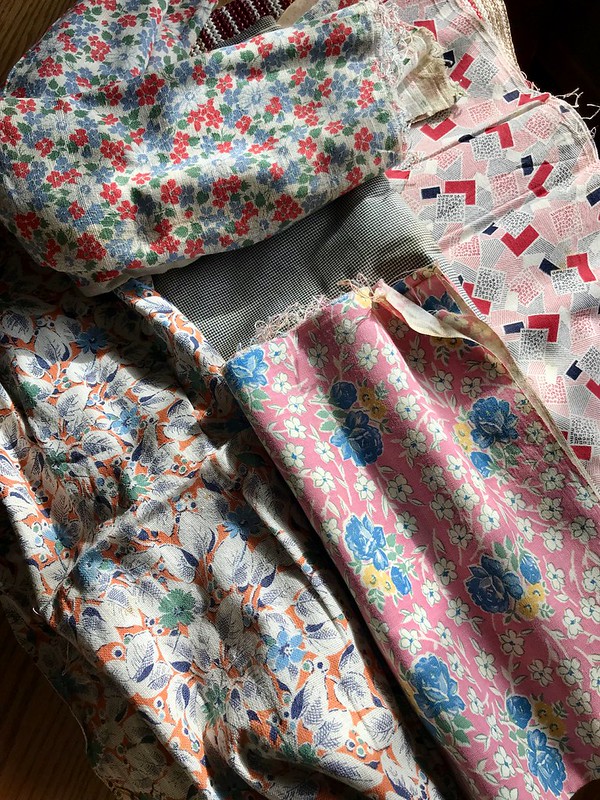
The backing fabrics:

Backing fabrics

My choices were a 6 inch block quilt with added borders and a pieced backside.

It will finish to approximately 73×73 inches.

We receive files for the in the hoop along with directions each month. This first month will be the creation of 12 blocks. As I am doing the pieced back and the optional borders, I have a few more tasks to complete.

First is getting the fabric ready. The fabric is pre-washed and ironed to make it ready to use. This was about a 5 hour task between washer and iron.

Creating the organization strategies and documentation begin – they will evolve with the project.

Materials Dcoumentation

Next was cutting the material for the first 12 blocks. Also cutting of the backing to create half square triangles – and then making them. Last was cutting the remainder of the backing pieces for the optional border. Time on these tasks were about 7 hours.

Backing and Borders cut

Half Square Triangles Back

Half Square Triangles - Back

Next is cutting the battilizer and begin stitching the first 12 blocks and then the some border blocks.

Month 1 Blocks

Our next gathering and demo (with an optional stay and sew) is March 1. I should have the blocks and border sections done by then. each block is approximately an hour to 90 minutes from start to finish.

Looking forward to this journey! Not sure I can wait 5 months -but that is the plan.


Creating in fabric – still Art

I continue to be creating in fabric lately. The digital part is documenting what I am doing.

I have a collector gene and sewing seems to fill that as well. There is the fabric hunt and acquisition. The tools and accessories. The patterns and the products. And then the set up and the organization. It really does fill so many spaces.

Organizing and creating rhythms and processes is necessary. I now have a command hook on the side of my sewing machine with my tail cutting scissors. Practicing using and putting back and always knowing where it is.

I used a letter sorter for hold my rulers. A vintage creamer and sugar bowl for my fabric clips. Bed risers on my table to raise it so it is comfortable for cutting and sitting at on a counter stool for assembly.

Next was the presser feet that came with my machine. the little plastic pouch was useless. I got an inexpensive plastic bead box and added labels. So far works great!

Presser foot storage

Bobbins – I started with a small plastic case. Each time I opened and took on out – they all came out and landed all over the room. And the tails – ugh!. I used some Amazon points and got some huggers for my spools and a BobbinSaver – a plastic ring that holds the bobbins. So far it is a huge improvement.

Bobbin storage

Thread tail containment


I have found a mentor to help me thru things. A smart and talented woman who does fantastic work – but with reality mixed in. She knows how to get to quality – but get the job done. Can’t thank her enough for taking me under her wing. We have some similar interests and she is so generous in her sharing and help online. LOL – she has chickens and roosters and one of her favorite fabric subjects are rooters…under her wing – — get it? LOL She is also a Flash WonderWoman! She can make 2 dozen feed sack totes in a day! Check her out at Grammies Little Aprons and Sew Much More on Facebook.

I am not looking to expand into selling lots of things and having to keep an inventory. But I am going to need an outlet to move some of the creations on. I already know I have more than I can use. I am exploring options.

The path I am most interested in is combining my vintage shopping pleasures with creating. The other tangent is learning more skills and getting to take part in activities from a small business in my hometown and support them – so using quilting techniques in my up cycle vintage creations. That probably really limits the market share. But I am not look

ing to earn living or make a fortune.

I met a vintage crafter online who was moving her MIL’s estate and purchased (very reasonably!) some Christmas tablecloths and a floral. The floral is dynamic. Not a favorite of mine, but it makes a statement. I worked on some interfacing combinations and some other things and created a nice size tote. Not as large as I had done – so actually more useful.

Standard tote

I was pleased with the results. I didn’t have dark pink thread on hand and didn’t edge the handles. My mentor was quick to point that out. I went ahead anyways.

There was still fabric left. I wanted to do a different style bag. Since I am not in a mass production cycle – I am more apt to create different bags for many reasons. One to keep improving my skills and two I don’t know what to do with them now – why would I have dozens of the same thing in different patterns. If I was doing craft shows or mass market, one type might work. For now I am creating one of a kind and limited designs.

So from this fabric I got a “Happy Bag”. A bag with a large “smile” pocket on the front.

Happy Bag - Front "smile Pocket"

Back of the bag.

Back of Happy Bag

I had to go to the vet today for meds for our Jaxin. It was a Saturday and there is this place near by called Northwinds Junk Post that I have wanted to explore. They are only open on weekends and it is 35 miles away – today was the day!

I was fortunate to find some seed sack cloth yardage. A little dirty – but cleaned up well. I can’t wait to use it as lining or as a bag itself. I will now be able to create an entire end product with vintage cloth!

Vintage Fabric SKOR!

All cleaned and folded for storage until used.

Vintage Fabric - cleaned and folded

And now I need to find LARGE vintage buttons and other doo dads!!! Lynn Prey – help!!! What do I look for and what are good prices?

For being in Wisconsin in the winter – things are feeling good and creating is going on.


Vintage camels tote

Vintage panel bag project

Finished the vintage camel cloth into a tote bag.

Vintage panel bag project

Added a pocket panel on the inside.

Vintage panel bag project

Feeling pretty good about this one. :-). No pattern – just math, some techniques and construction things I finally was able to do smoothly. Improvement on my edge stitching. Using up fabric and repurposing fabric that may have went to the landfill.

Now what do I do with it????


Fabric overload….new creations

Well I seem to be in a hands on fabric creation mode vs. digital right now. Seems okay with me.

This is a panel piece I received in a gift of a large bag of fabric pieces that had been collected. It is somewhat woven and could have been upholstery in its first use or a wall hanging? It has a weak and threaded section that I hope I can piece together a little bit. But fusing stablizer to it should hold it together. Part of the charm of repurposing is the blemishes. πŸ™‚

I soaked the cloth in several baths over a couple of days and then put it thru a wash cycle. It is clean now – but probably lighter than original. I like that it is a little brighter.

New project

I had been at the Sewing Basket during a skinny bolt sale and found the green and gold print. There was a yard left and it seemed to be calling. I was extremely pleased when I got home and found it was a good match.

My mind had the piece destined to be a bag for better use in it’s next iteration. The colors and subject would make it difficult to use as a wall hanging without a specific person in mind that would find it a fit.

I am trying to NOT become a fabric hoarder and use as much as have and only get what I know I will use soon. The basket weave print is from when I was making things for my grandson’s nursery that didn’t get used.

Bag design

Fabric - Vintage

the panel was gifted to me by Judy S. Some soaking and cleaning brought out the colors. I was able to find some fabric that was perfect to go along.

I stabilized the tapestry and then backed ti with a cotton to create the binding.

Next it was adding it to the background.

The binding fabric is what I will use for the lining.

The bag will end up being about 20X16.

Learning to stop when I am tired so I don’t get sloppy.

I am excited to see how this will turn out!

Stay tuned!


Turns into Practice and supplies for another…

So I dove in today and cut up one of the vintage cloths I had gotten a few months ago. I bought it online. It wasn’t what I thought it was when I got it – but seemed okay. It had more stains than I could get out – but heck – it is used.

From create to practice to crumb supplies

I decided I would use the squares as quilt like patches instead of larger pieces cut that would cut off many of the graphics.

I started by cutting the border off so I can use it for the sides and top of a tote. then the strips of squares.

From create to practice to crumb supplies

All seemed to be going well.

Since the squares looked like patchwork – I thought I would do a semi quilt as you go panel for the front and back.

What I learned was vintage cloths while printed are not precise. Each section of squares are a different size even though when you view the full piece they all look the same. The number 3 seemed right to me so I I made 3 rows of 3.

From create to practice to crumb supplies

From create to practice to crumb supplies

It looked good on the assembly table….

I needed to bind around the panels after they were sewn onto the red. The panels were not even so trimming and futzing happened. I decided not to use the border on this bag because I could already see it wasn’t going well. I will use that on a second bag.

By using the tablecloths as fabric – there are many issues. I spend a lot of time folding – marking off – changing to see what way the fabric might become something new.

I set my mind to the 9 squares. Got them in place on strips and began the binding. Since the squares are not really square things started going sideways and a little off. Some “off” has a charm. Too much and it starts to look sloppy. And yet it is not being sloppy – but having to figure out and play with something new. I should have stopped and come back to it – but wanted to keep going.

Then my iron decided to throw a fit and let out a gush of brown water! – one whole section of the bag was stained.

I got things pieced together – I was feeling a little better about the direction. I then realized the bag was too big to be useful. The binding to hold the squares in was making the graphics seem too cut off. So I practiced trying to get the top edging lines straight and in place. 20 tries to practice! And I did get better at it.

I boxed my corners – that went well. πŸ™‚

I stitched up the sides and gave it a press. It didn’t look too bad from a distance. I thought I would stop for the day and next time add the handles and the lining. I wanted to make some inside pockets too.

Looking at it a little longer – NOPE – it is going into crumb quilt blocks. I need to start knowing when to move on from something and start again.

I do think binding on the crumb quilt when the time comes will go much easier. All those pieces are more exact.

Stay tuned – you will see some of this in other projects. And I still have a second chance with this fabric for another tote try. Now I am thinking no grid and more free form because of the inconsistency of the blocks. That will help in keeping the bag size reasonable too and less piecing. I also am thinking lace or rick rack along the edges rather than traditional binding. Hoping the next one is not practice.


The iron spit out on the bottom of the bag and bottom block.

From create to practice to crumb supplies

This side was a little better, but the binding crept too far into the blocks. But in a crumb quilt they will look like they belong.

From create to practice to crumb supplies

css.php